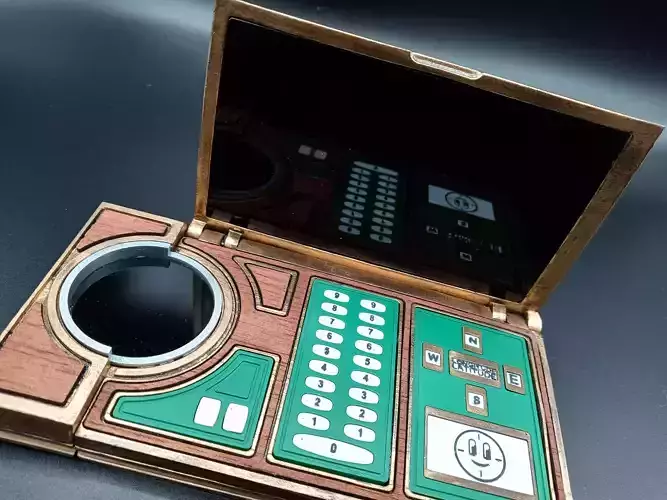
1/25
Fully Print Tested and Ready to go!
For full details and latest updates please visit: https://www.thingiverse.com/thing:4919791
Why I am making this: Loved this show it developed great characters, fun world building, and especially interesting props. This prop caught my eye, and I am working on machining one out of brass. I thought while I work on my “hero” versions, I thought I would share my files and research to this point. This is based off of a lot of research of the Tempad from what has been seen on and off screen.
How accurate is this? Please understand that there are few -clear, strait on, photos, and no good scale reference to base this on. Some sides are rarely seen and there are some discrepancies between the different versions of the prop used in the show so please understand this is my guess, it is a good guess based on everything I could find… but without more information I cannot guarantee this is 100% accurate. In the show there are several versions of this prop with subtle differences. This is based on the hero opening version that splits into two parts (the Temp Pad and Time Spinner used to control the restraint collars. At this time I feel this is the best printable version of this prop available.... however I am clearly biast as it is my work that I spent a month + trying to get right. There are some terrific other versions out there so I encourage you to search around on this site and other sites and see what is out there that may best fit your needs, prefrances and style and make your own decisions.
I have tried to make this a fun time to print and assemble and put a lot of testing in this to get things right. A few file options have been made available including things split up by machine type, by color, even a few options with it preassembled if you don’t care to print the parts separately. This should work nicely if made with a half decently accurate machine, and material parts should slide together with minimal sanding, clean up or glue needed . If you have trouble let me know so I can make it changes to make this easier for everyone.
Keep in mind everybody’s machines and settings are different so I can’t make this work for everyone right off the bat without good feedback. I am still stress testing these files on different machines so if you have questions comments or concerns let me know what I can do to help make this work for your needs.
I have versions Meant for FFM (filament based 3d printing ) and resin printers. There are subtle changes between both files as both types of machines have their strengths and weaknesses.
The FFM Files should load pre-oriented for best results printing on a smooth surface (aka some parts print face down to take advantage of the smooth surface left by the bed side of a print. I am working on pre-oriented, drain holed, hollowed, and supported files for resin printing but I want to make sure I have tested each one before I share.
FFM Tips:
When printing the White buttons with lettering do the first 3 layers (at .2 layer height) in white than do a color change to black, save you the trouble of trying to paint this-When printing the Brown- Wood make sure to check your slicer preview so that the first layer is going in the correct direction to give a wood grain like effect. I recommend a very slow first layer (like 5mm a sec) and only one perimeter on a smooth bed.
The laser cut files,I have provided SVG files for those of you with a laser cutter to try to make the wood panels or 1/16in gloss black acrylic for the screens. You can also use the files with a vinyl cutter for the wood to cut out wood decals to shape, the size things should be is written in the description in case your software rescales things.
REVIEWS & COMMENTS
accuracy, and usability.


