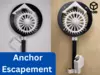
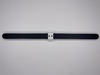
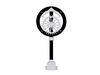
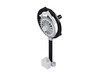
This 3D printed anchor escapement mechanism is an engaging mechanical model that can be mounted on a wall. Designed with precision and functionality in mind, the mechanism is ideal for demonstrating basic clock mechanics or as a decorative and interactive piece. Furthermore, pennies are used for the wights in the pendulum and normal weights so that you can easily change the configuration of the escapement. Changing the amount of pennies in the pendulum weight will change the duration of the pendulum swing, and changing the amount of pennies in the normal weight will affect the overall speed of the escapement.
Uses
- Demonstration model: Use it to explain or study the principles of clock escapements.
- Decorative display: Add a touch of mechanical charm to your walls.
- Interactive piece: Enjoy the motion of the escapement when actuated.
Print Instructions
- Material: PLA or PETG for durability
- Supports: Yes
- The bolts require supports if they are placed horizontally.
- Orientation: Ensure each component is printed in the orientation that minimizes overhangs, supports, and maximizes strength.
- Print the bolts horizontally to maximize strength.
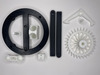
Pieces Included
- Plate (found in the Plate file)
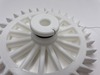
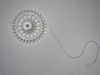
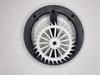
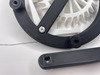
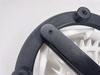
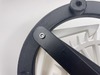
- Gear (found in the Mechanism file)
- Anchor (found in the Mechanism file)
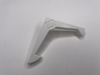
- Top Shaft (found in the Pendulum file)
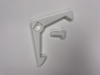
- Bottom Shaft (found in the Pendulum file)
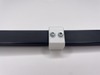
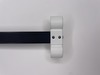
- Connector (found in the Pendulum file)
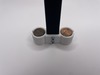
- Pendulum Weight (found in the Pendulum file)
- Anchor Bolt (found in the Bolts file)
- Gear Bolt (found in the Bolts file)
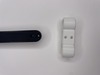
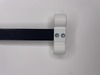
- Weight (found in the Weight file)
Not Included
- Mounting screws (requires 4 screws with a 7 mm head diameter, 5 mm head thickness, 5 mm shaft diameter, and at least 35 mm shaft length)
- Drywall anchors (if needed)
- Glue and or bolts (requires 5 bolts with a shaft diameter of 4 mm and shaft length of 20 mm)
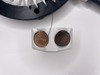
- Penny (as many as you need to achieve the desired weight)
Assembly
- Use the hole in the gear to attach a piece of thread to the gear
- Tie a loop in the other end of the thread
- Wrap the thread around the spool in the gear (the length of thread you use will change how long your escapement will run)
- Place the gear on top of the threaded hole in the plate
- Use the threaded bolt to attach the gear to the plate
- Then place the anchor bolt in the anchor
- Put the assembly in the non-threaded hole in the plate
- Now connect the top and bottom shaft piece with the connector
- Use a bolt or glue to secure this connection
- Then attach the pendulum weight to the bottom shaft
- Use a bolt or glue to secure this connection
- Now attach the pendulum assembly to the unused side of the anchor bolt
- Use a bolt or glue to secure this connection
- Place the weight in the loop in the thread
- Place penny in tho the pendulum and normal wight until you are satisfied
If you enjoy this model, please leave a like and a comment. Please contact me if you have any questions, concerns, or problems.
If you want to support the creation of more models like this one, you can subscribe to my Printables Club (at https://www.printables.com/@Devise3D#join.@Devise3D.451) or you can purchase an individual model on CGTrader (at https://www.cgtrader.com/devise3d).