1/10
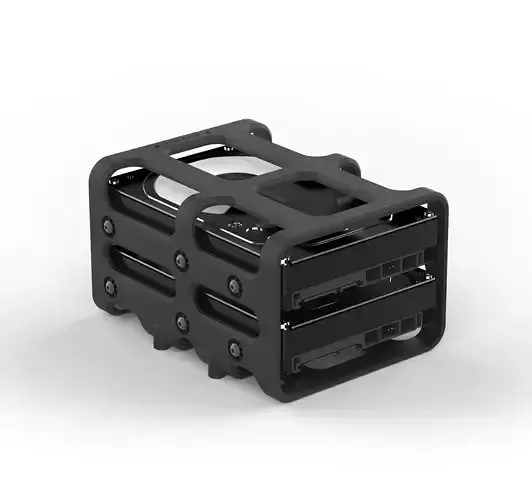
Upgrade (or simply replace) the HDD mounting rack on your NZXT H210 / H210i PC case!
Developed using the same principles as our Aerospace Hard Drive Enclosures, this 2x 3.5in HDD rack was designed primarily to be HDD safe and easy to make.
Unlike the stock metal HD mounting rack that’s included with your case, our design incorporates ribbed vibration grommets which more effectively decouple your hard drives (lessens the vibrations they receive / transmit) - not only reducing the risk of read and write errors but also (potentially) greatly improving the longevity of your drives.
It’s also a lot better in terms of thermal management. Given that heat is one of the other biggest killers of drives (apart from drops and water spills), this design eliminates as much surface area around your drives as possible and introduces big open air gaps for better ventilation and just overall better air circulation in the case’s bottom compartment.
At roughly 0.16” (4mm) thick, it’s made to be easy to print with a variety of materials and methods and fairly strong whether using a dense or light infill (if printing with FDM specifically). Tolerances are snug so some minor sanding and adjusting may be required if you get a lot of zits or blobs; however, if your settings are pretty dialed in, the grommets, screws, and drives should slot right into place.
Post processing is also meant to be pretty simple, only requiring you to drill and tap four holes on the bottom before assembly, installation, and (of course) a bit of cable management to wrap things up.
In this download you’ll find two fine-meshed, ready-to-print-STL files along with a bill of materials that specs all of the ancillary components (with McMaster links) and provides some additional information pertinent to production and assembly.
Need a rack printed for you? DM for a printing quote. Want one designed for a different PC case? Send some pictures and dimensions, let’s work it out!
Tips:
It's going to be a tight fit... Definitely install this HD rack before your PSU if doing a fresh install, otherwise very gently move all your cables over and very carefully slide the rack in as to not damage any of the power cables.
Don’t crank / over-tighten the drive mounting screws - it will negate all of the benefits of ribbed vibration grommets.
We strongly recommend printing with one of the openings oriented down (can be front or back), and more importantly, to use a really solid support strategy when printing this rack given that there are some portions that are tall, flat, and thin (which may want to bend or warp as the print grows higher).
Apart from that, we recommend just practicing good printing habits such as: make sure you dry your filament - dial in your print settings before printing - print on a PEI, gluestick, or with some circle pads / skirt if bed adhesion is a concern - print in an enclosure if you’re worried about warping and layer adhesion (especially if printing PETG, Nylon, or ABS), and don’t start assembling anything until you’re confident you’ve got a strong / successful print that you’re willing to work with (don't hesitate to reprint if necessary).
Lastly, if your slicer software doesn’t automatically interpret the correct units / scale try scaling by 25.4% (if it imports really small) or 0.0393701% (if it imports really big).
Please feel free to reach out if you get stuck or need help at any point in the process.
REVIEWS & COMMENTS
accuracy, and usability.


