It's no secret that the spline connection of the intermediate shaft (hereinafter promval) and the internal joint (tripoid) on cars of the Mazda Capella family (and not only) is asore place and with increasing mileage begins to remind itself more often in the form of vibrations when accelerating at different speeds. These vibrations are caused by wear on the outboard bearing and increased concentric play in the spline joint of the camshaft and tripoid. As a rule, the axial backlash is practically absent or is present to a very small extent, while the radial misalignment of the shaft and tripoid axes can occur within very large limits, which sharply increases the load on the outboard bearing, causing its premature wear, and vibrations appear, again due to this misalignment. If there are no problems with replacing the outboard bearing, then it is not so easy to eliminate the backlash in the connection.For the most part the wear slots promval, not tripod that brings more problems, because to find promval on the clashes in the neighborhood is very problematic, and the contract price of the kit ranges from 5 to 30 thousand, plus the waiting time, which in itself is not very nice.This problem has not spared my father. He is the owner of the Mazda Capella and while this problem caught up with him, we decided to think about the whole thing and solve it with an engineering approach once and for all without compromising maintainability. An initial analysis of the Internet showed that the most common method of repair is the needle and welding method, but in this case, we lose the ability to replace the outboard bearing and the joint, which in itself is not comme Il faut. Therefore, it was decided to do everything in their own way, similar solutions are found, but there are few descriptions, so I offer my own solution to the problem.
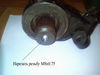
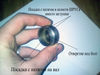
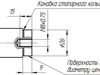
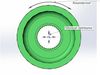
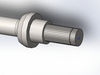
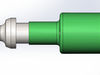
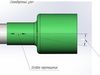
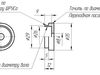
- On the promval protecive surface with a diameter of 26 mm, a depth of the snap ring groove is 9 mm, shaft end tapped м8х0.75 to a depth of 15-20 mm. (Sketch attached)
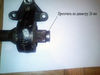
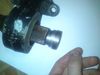
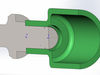
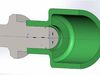
- From the body of the plug is removed tripod
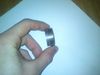
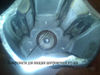
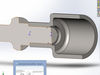
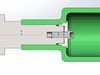
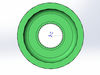
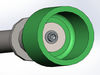
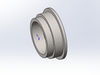
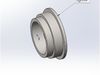
- for centering the joint And the shaft, a centering sleeve is made, the sleeve sits with tension on the ground surface of the shaft and its external surfaces, also with tension, mating with the body of the joint, in the place where the plug was, the sleeve material is alloy steel. (A sketch of the bushing is attached).
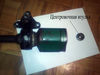
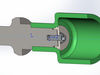
- Next, everything is assembled in the usual order and attracted by a high-strength bolt with a washer.
- Profit-radial loads are perceived by the centering sleeve, and the connection is fixed by tightening the bolt. At the same time, there is free access to the outboard bearing and the replacement of the joint.Note. All dimensions in the drawings are strictly for reference and may differ from yours. I recommend that you process the parts directly after measuring your components and adapt the centering sleeve to fit your dimensions.