


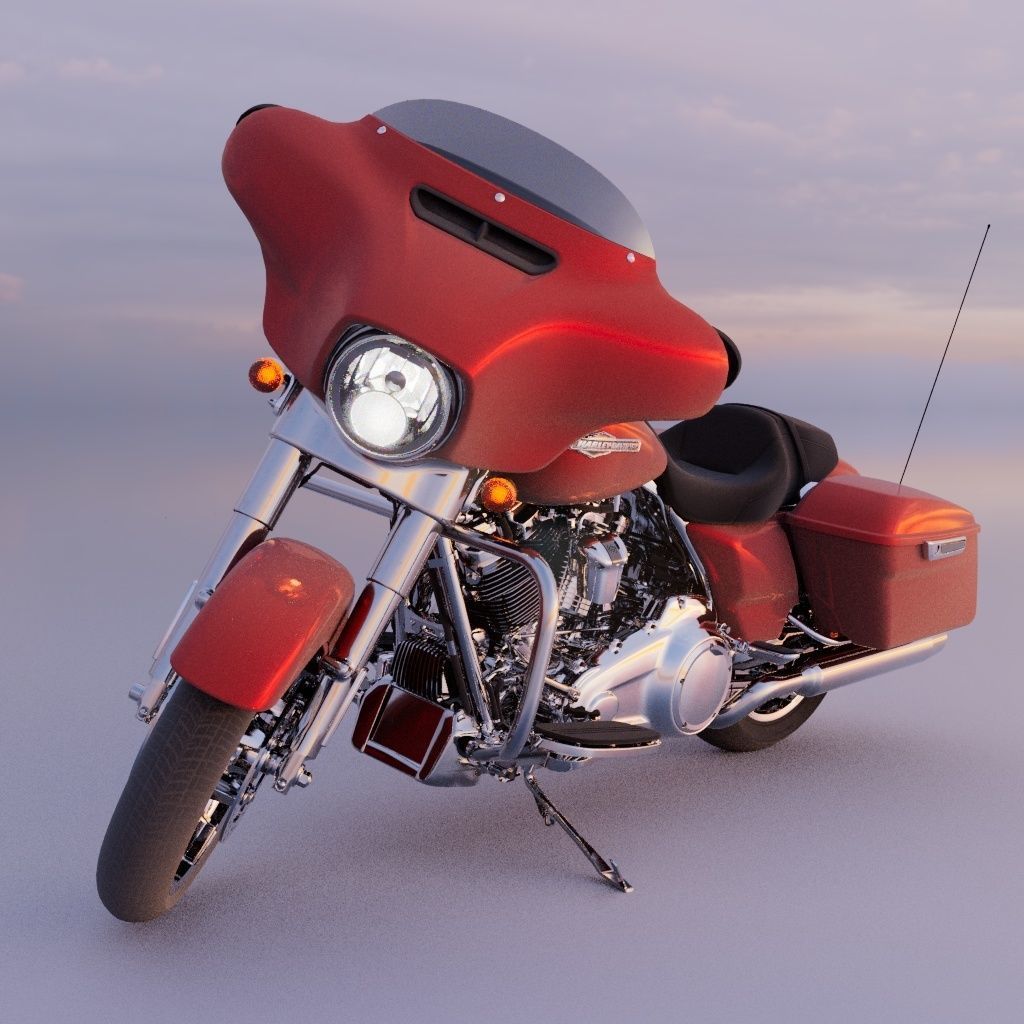

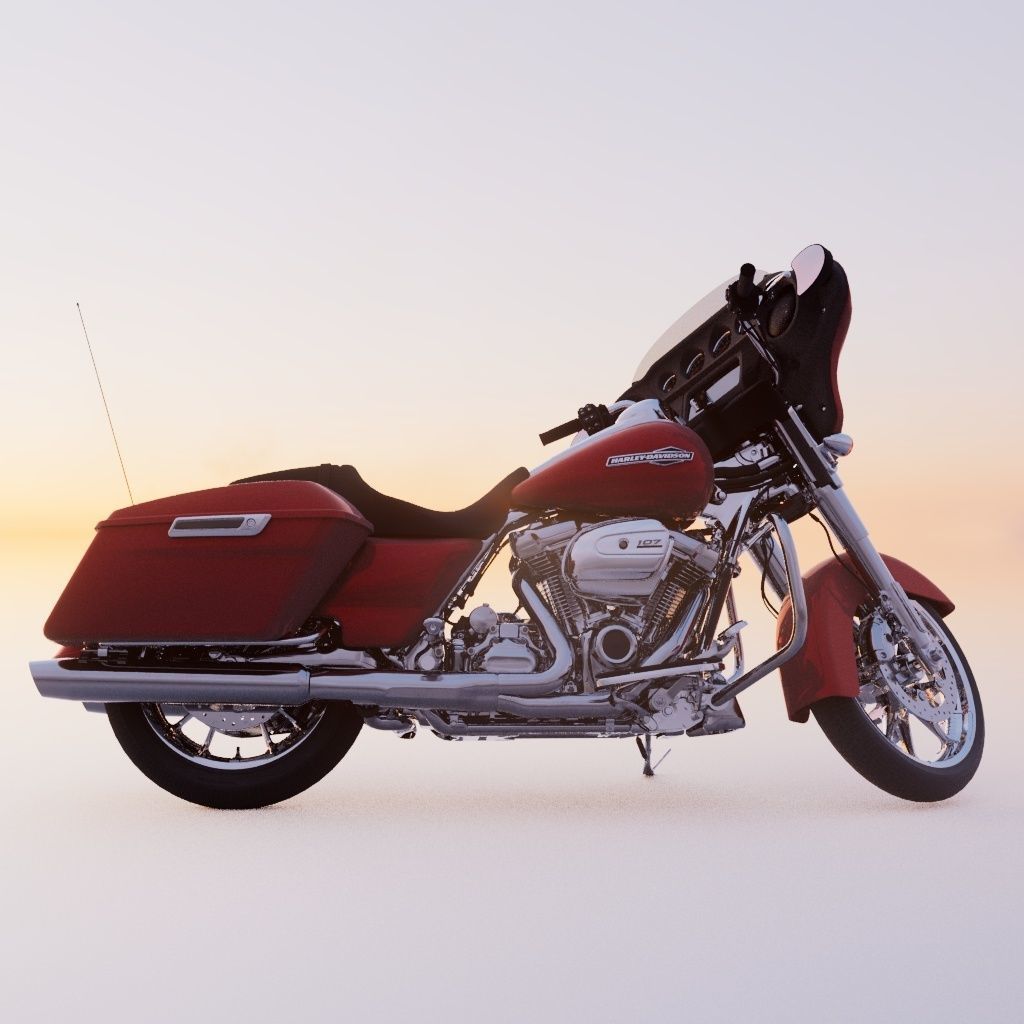


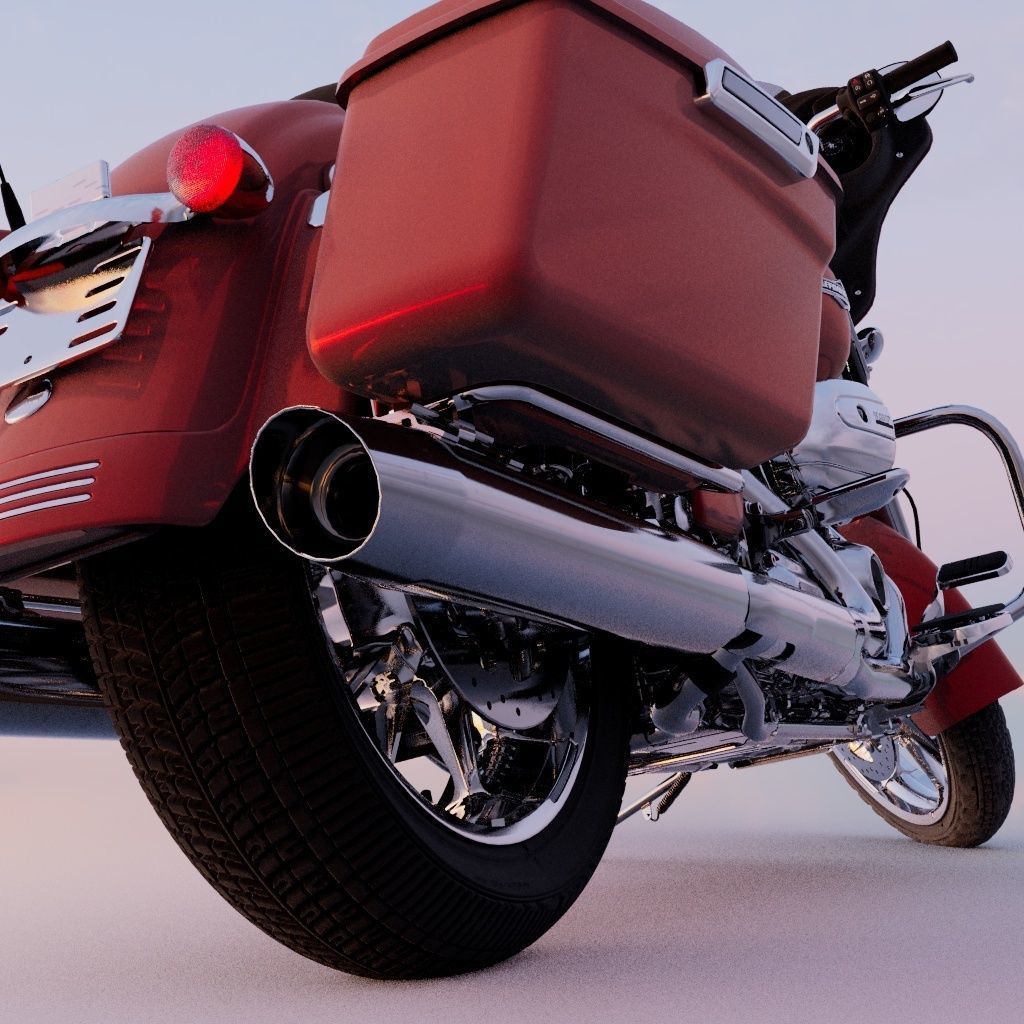
Harley Davidson Street Glide FULLY RIGGED 3D model
This is a complete asset, ready to drop in a scene and animate, with minimal adjustment. Which brings me to the following:Before putting your hard-earned money into this model READ THE FOLLOWING CAREFULLY so as not to get confused on what you are getting:
The archive includes the following:
- Complete Maya file, including a dome light (remember to turn it off or delete it when importing in an existing scene), and a matte floor.
- Complete Adobe Substance Painter file to repaint the model as you see fit.
- Complete texture set comprehensive of masks for materials and touchscreen selector
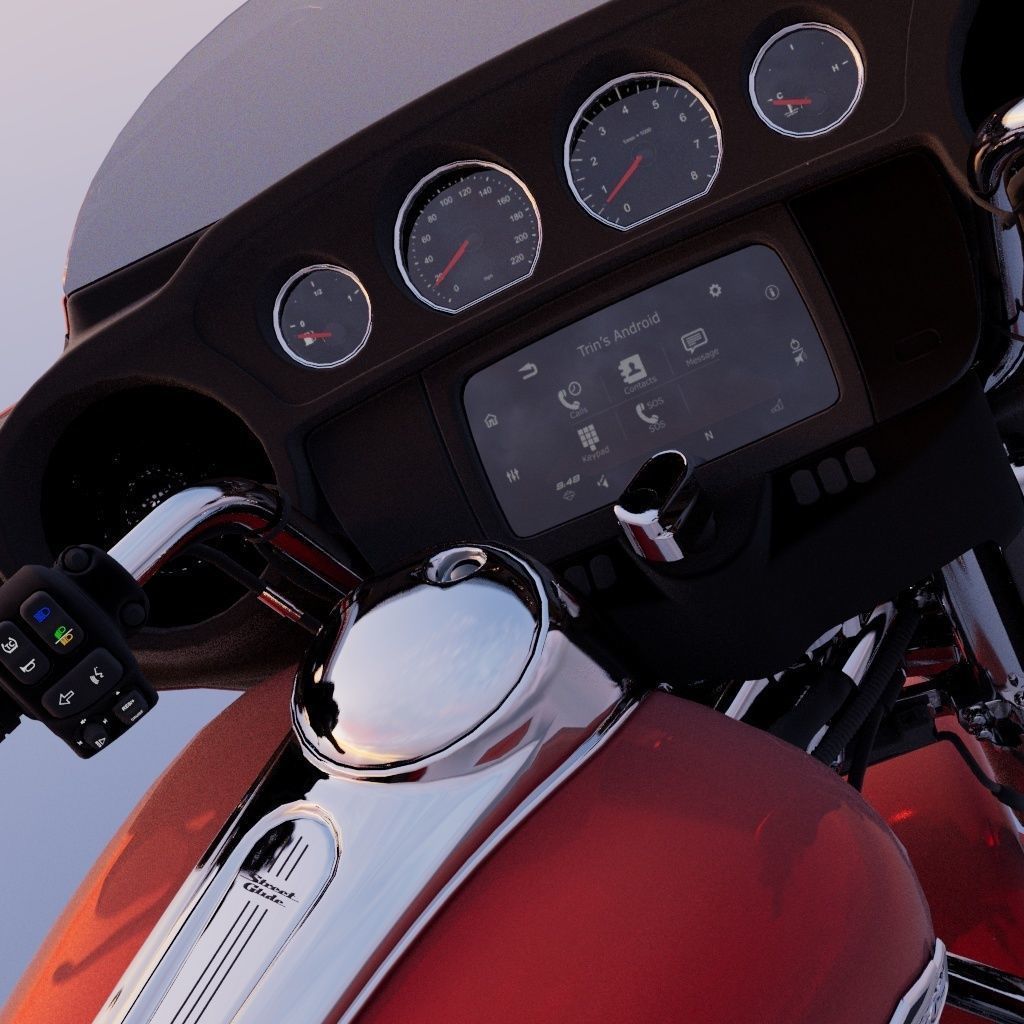
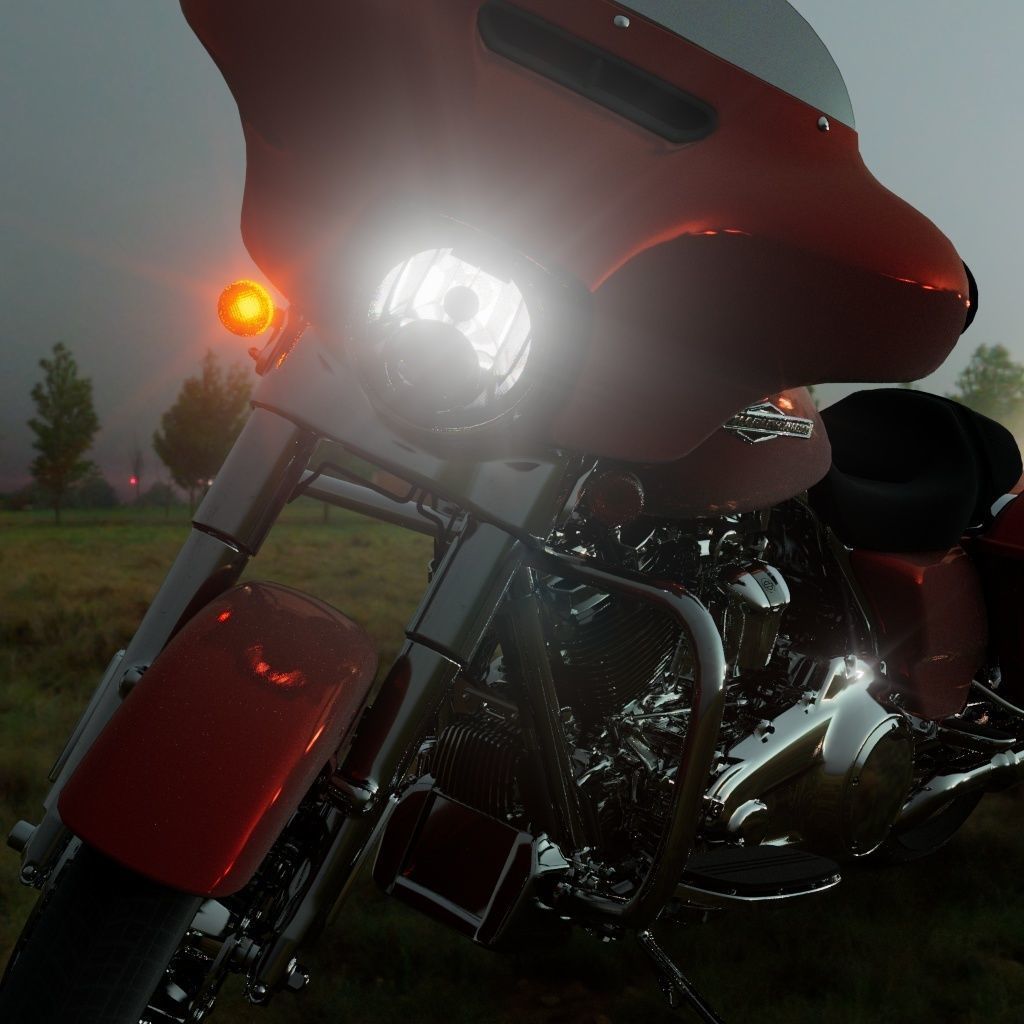
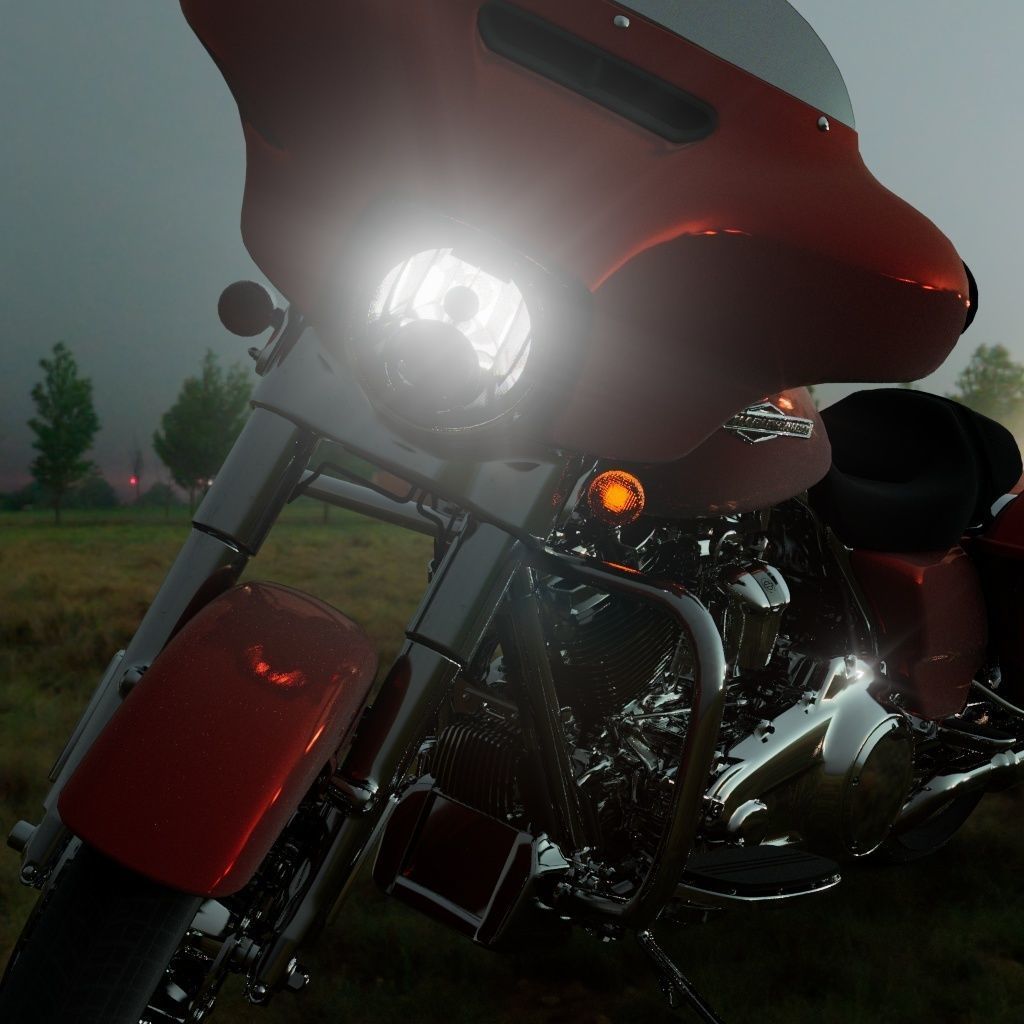
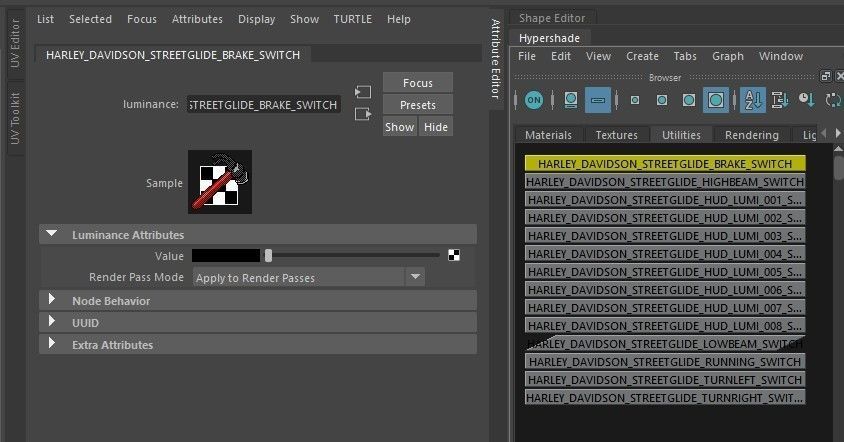
The model's UV map is one single UDIM tileset, and it includes base material (_BASE), refractive shader(_IOR), luminous materials (_LUMI).All lights are functional, and are controlled using luminance nodes in the hypershade, with suffix _SWITCH. Just type SWITCH in the utilities tab of the hypershade, and you won't miss them.
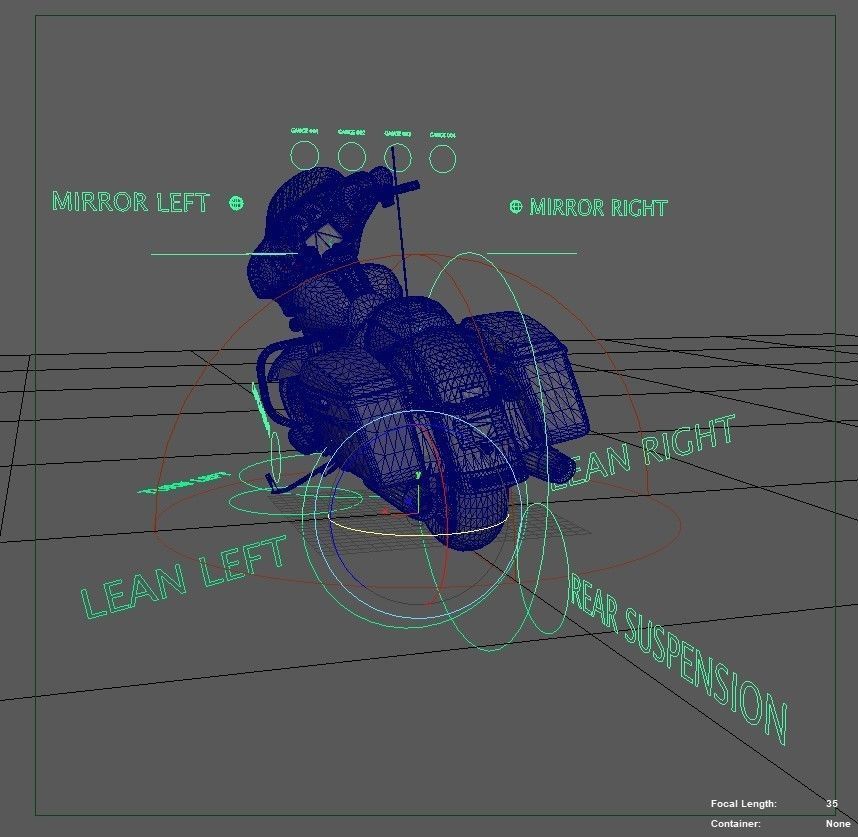
The Outliner group labeled CONTROLS is self-explanatory. It contains all NURBS objects used to control the bike. These controls are visible in viewport. You won't need to select anything else but those objects, to control every moving part of the Harley, and most controls are labeled in viewport, but all controls are clearly labeled within the CONTROL group in the Outliner.
There is no IK/FK rigging, so you souldn't get any unpredictable behavior if you connect the position control of the bike on a motion path. I have tried too keep this rig as basic and clean as possible, while maintaining a very high level of flexibility.
Finally, and this is IMPORTANT:
This model's materials require MAXON REDSHIFT.All SWITCH coontrols WILL NOT WORK if you can't load Maxon's Redshift materials in your version of Maya, which MUST BE at least 2023.
With this said, one thing you'll notice is that when rendering close-ups, you will get a certain amount of polygon edges poking out. If that happens, turn on displacement ONLY for the objects you need to smooth out. This is a high-res model, designed for selective enhanced rendering of photorealistic visuals, which means: don't go about turning on displacement for EVERY SINGLE mesh, or you'll get old waiting for your renders.
Obviously, this piece of advice is only for those with limited experience with these types of models. The rest of you pros, go nuts.

3D Model formats
Format limitations
- Autodesk Maya 2023 (.ma, .mb)1.57 GBVersion: 2023Renderer: Redshift 3.5.12
- Substance Painter 8.2.0 (.spp, .sbsar, .spsm)1.57 GB
3D Model details
- Ready for 3D Printing
- Animated
- Rigged approved
- VR / AR / Low-poly
- PBR approved
- Geometry Polygon mesh
- Polygons 557,091
- Vertices 0
- Textures
- Materials
- UV Mapping
- Unwrapped UVs Non-overlapping
- Plugins used
- Publish date2022-12-24
- Model ID#4185190
Similar Models

Users who bought this item also bought...
