Body Armour 3 - Modular System 3D model
Sci fi inspired armour in the style of a ballistic vest. There are various parts that can be set up however how you’d like. There are chest and shoulder plates but you can use them as you like for Torso and Back.
The Top plates sit into the bottom plates.
If you need to resize, use the set with no holes. If you want to add holes later after sizing, great!
This approach is so that the top plates can be changed, have battle damaged sections added or removed as you like.
There are 4 sets of files combined into one layout. You will need to split the files as required. I have laid them out to make this easier to do. Squared = sharper corners. Rounded = Rounded egdes.
2 x Top set with Holes. 1 x Rounded edge 1 x Squared. 2 x Bottom Plates with holes. 1 x Rounded edge 1 x Squared. 2 x Top Plates with no holes (best for sizing if needed) 1 x Rounded edge 1 x Squared.2 x Bottom Plates with no holes (best for sizing if needed) 1 x Rounded edge 1 x Squared.
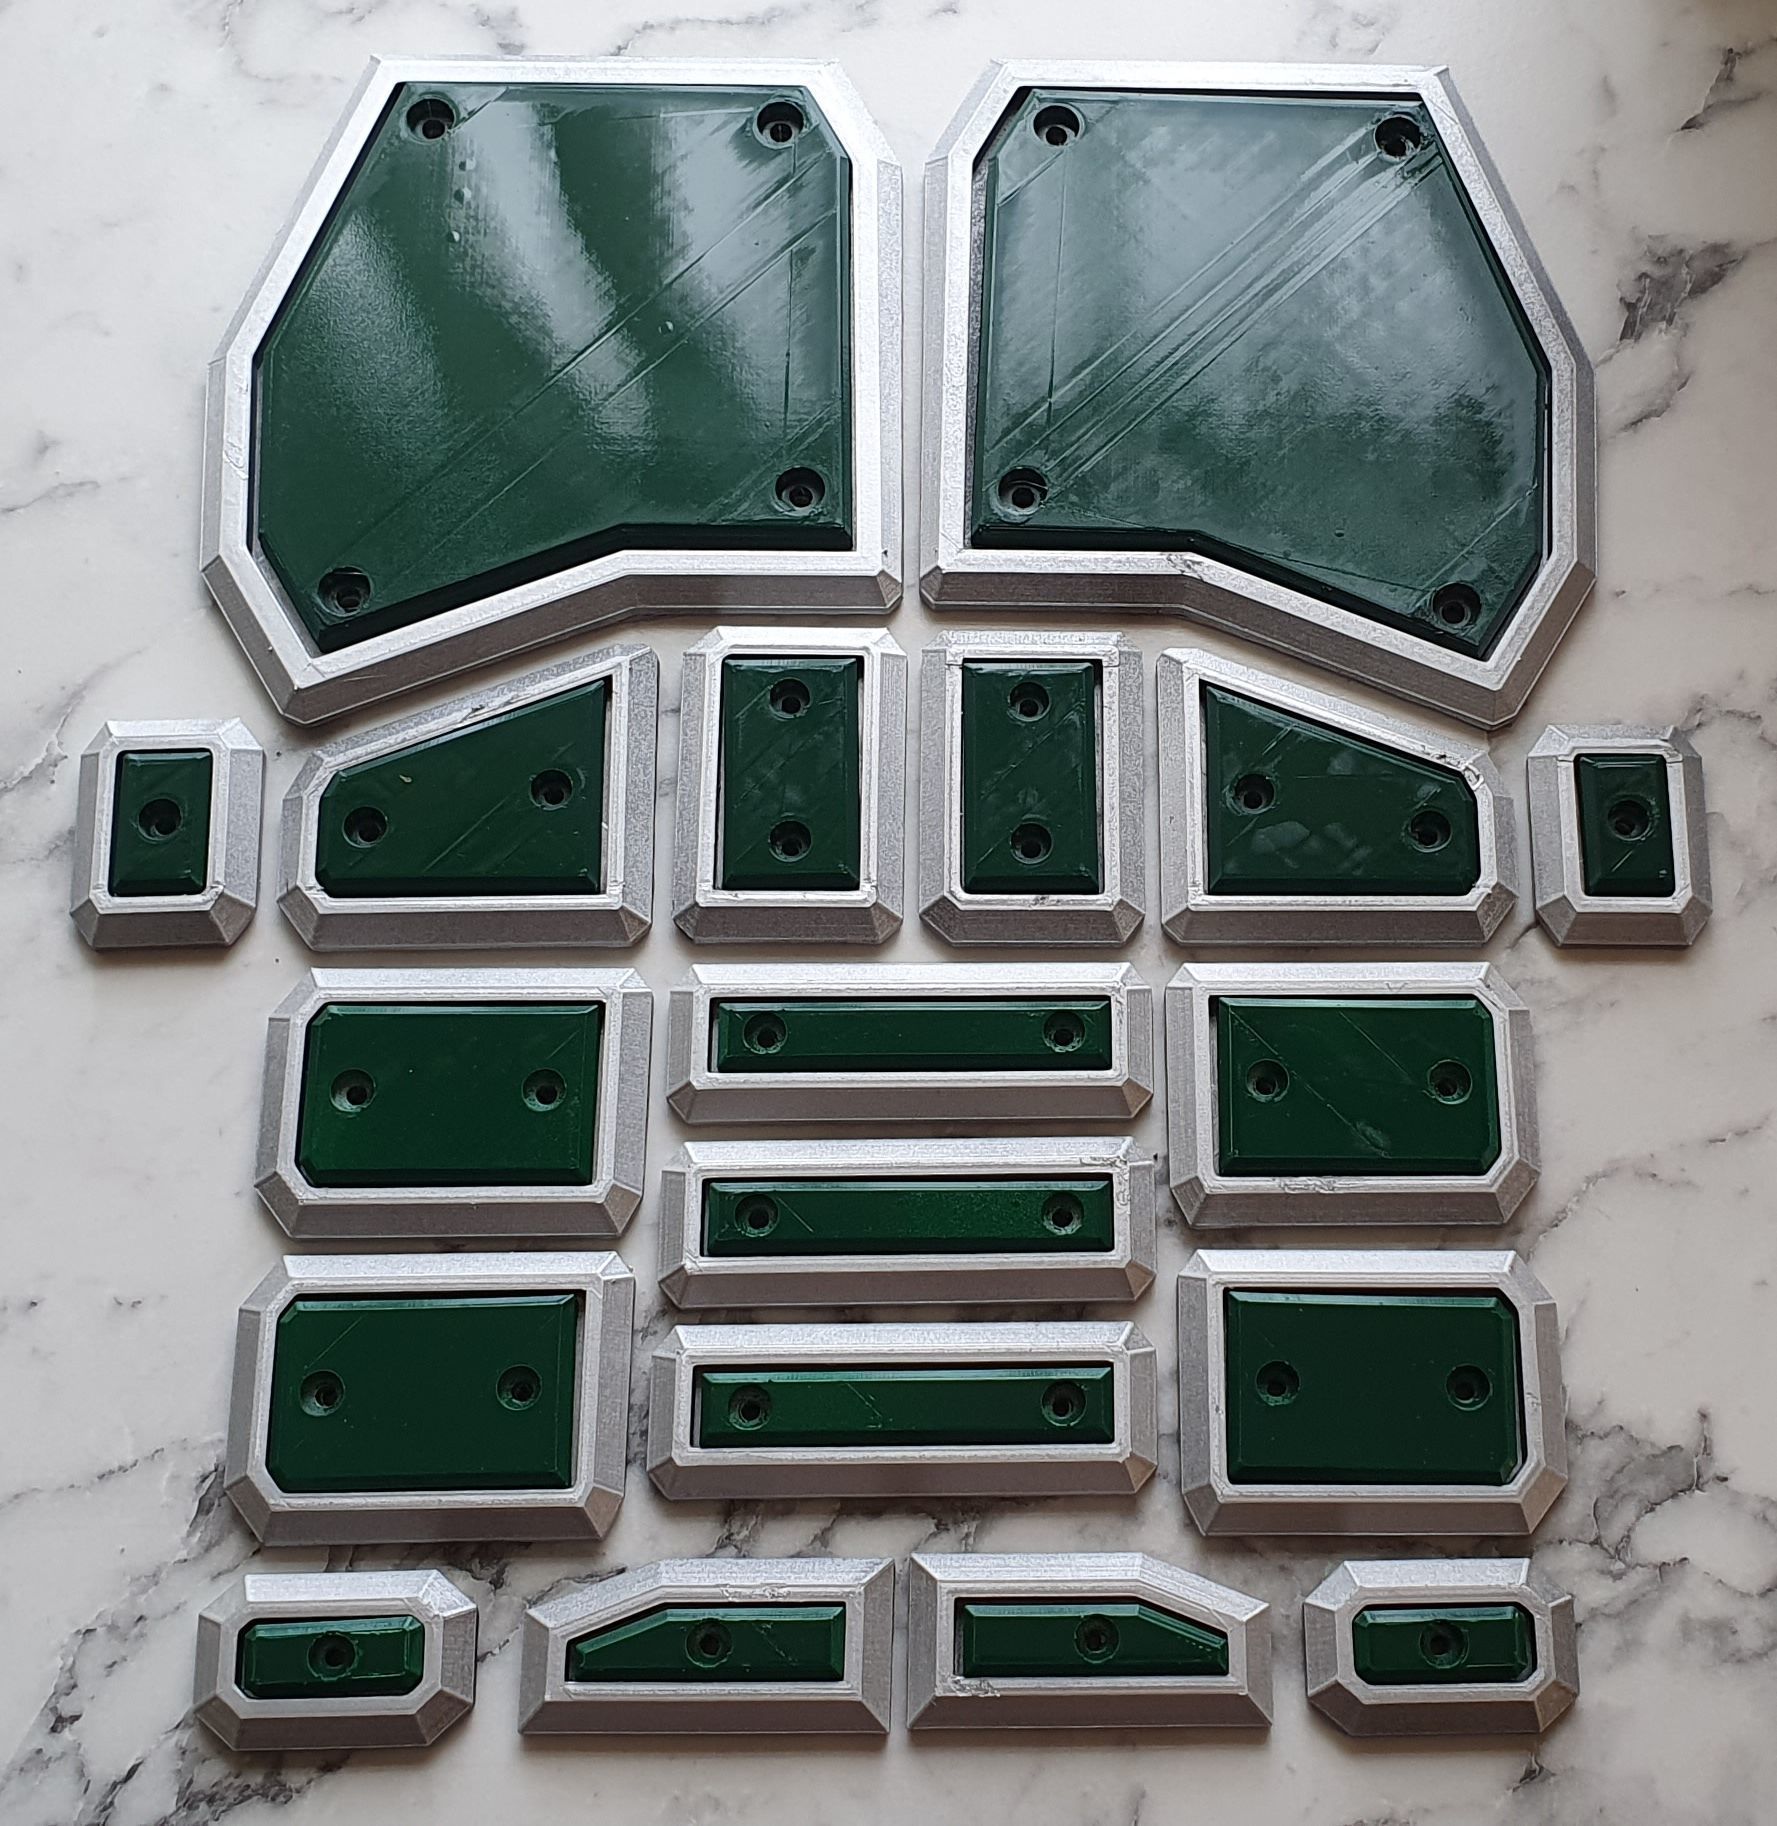
I’ve also added a set of spit files, Rounded and Squared. See image with sets laid out for reference.
I went with a silver paint on the back plates and green on the front plates, (see image). I thought it was a nice sci fi look, but I’m sure others are better.
These will need mirroring and splitting from each other. Please see YouTube video’s for how to do this, there are plenty if you’re new. Holes sizes are for M4 and M3 bolts or screws, your choice. Pec is M4. Rest are M3.
I did mine at a standard .4mm nozzle and came out great. I’ve laid the files out so they can be separated easily I did no clean up on the plates due to time constraints and wanting to show how they came off my printer.
As always, have fun.


